
Arduino Mega 16-LED Bar
Arduino Mega 16-LED Bar is a runnable microcontroller simulation example on SensBench — open the wired circuit, inspect the code, and compile real firmware in your browser, no install needed. Last updated Aug 14, 2026.
FREE SIMULATOR EXAMPLE · BEGINNER
Arduino Mega 16-LED Bar
This example drives sixteen LEDs from pins 22 through 37 of the Arduino Mega 2560, sweeping the lit position up and back every 50 ms for a full-width Knight Rider scanner. It is the 8-LED chase scaled until only a Mega-class board has enough pins to play.
| Board | Arduino Mega 2560 (ATmega2560, 16 MHz) |
|---|---|
| Difficulty | beginner |
| Category | circuits |
| Libraries | None — just the Arduino core |
| Runs in | Sensbench browser simulator — free, no account |
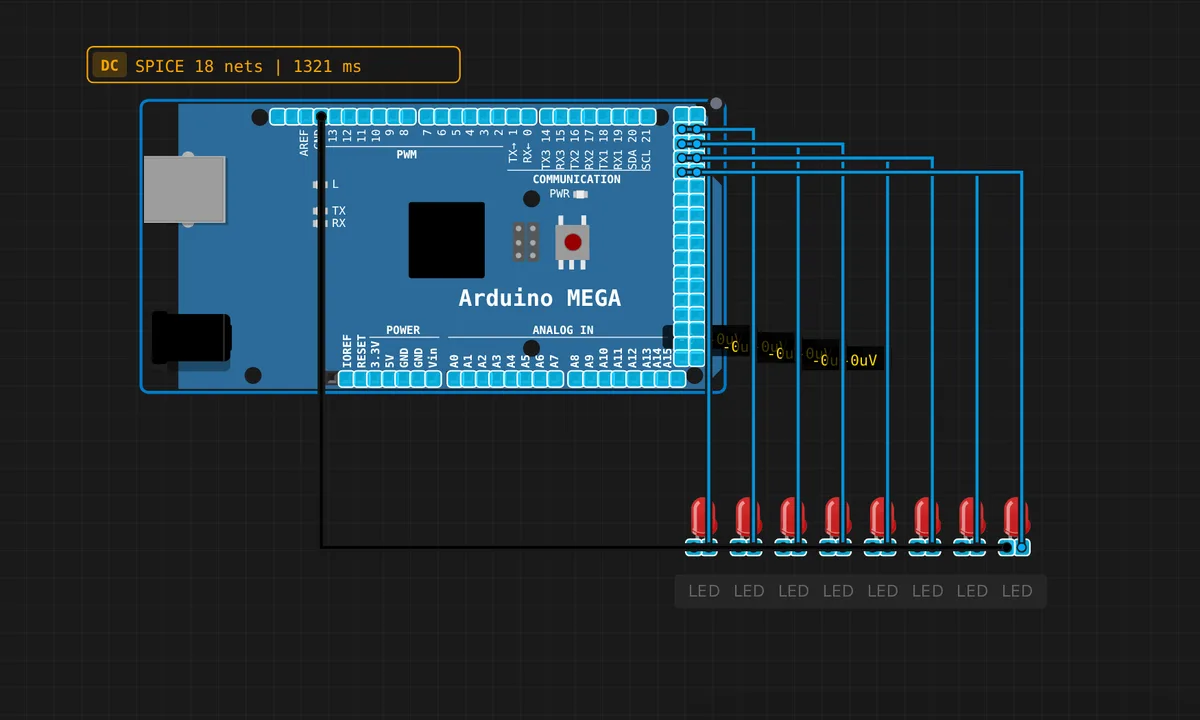
The exact circuit you get when you open this example — already wired, ready to run.
The sketch
// Arduino Mega — 16-LED Knight Rider
void setup() { for(int i=22;i<=37;i++) pinMode(i,OUTPUT); }
void loop() {
  for(int i=22;i<=37;i++) { digitalWrite(i,HIGH); delay(50); digitalWrite(i,LOW); }
  for(int i=37;i>=22;i--) { digitalWrite(i,HIGH); delay(50); digitalWrite(i,LOW); }
}
How it works
The whole setup is one compressed line: for(int i=22;i<=37;i++) pinMode(i,OUTPUT);. Sixteen pin numbers, one loop — this only works because the pins are consecutive, which is the real lesson: on a board with 54 digital pins, choosing a contiguous block of I/O turns sixteen lines of boilerplate into three.
The loop sweeps pins 22 to 37 forward, then 37 back down to 22, at 50 ms per step with digitalWrite(i,HIGH), delay, digitalWrite(i,LOW). Unlike the 8-LED chase, this version does not skip the endpoints — each end LED stays lit for two consecutive steps, which reads as a subtle dwell at each end of the bar.
Before you build it for real
Sixteen LEDs means sixteen current-limiting resistors — non-negotiable on real hardware, since each pin tops out at 20 mA and a bare LED on a 5 V pin will exceed that. The sneaky Mega-specific trap is power: sixteen LEDs plus the board can push past the 500 mA USB limit if you change the pattern to light many at once, and a brown-out reset looks exactly like a code bug. Keep the one-at-a-time pattern, or feed LEDs from a proper 5 V rail.
Get the parts
Related examples
FAQ
Why start at pin 22 instead of pin 2?
Pins 22–37 are contiguous on the Mega's header and map to a single GPIO port, which makes wiring sixteen LEDs orderly. Pins 0–13 carry the UARTs, SPI and the onboard LED, so starting at 22 also keeps those free.
Can I drive all 16 LEDs on at the same time?
Technically yes, but do the math first: 16 LEDs at even 10 mA each is 160 mA, most of the ATmega2560's 200 mA total budget. This sketch sidesteps the problem by lighting exactly one LED at a time — patterns that leave multiple LEDs on need lower-current resistors or transistor drivers.