
[Pi 3] Running Lights (5 LEDs)
[Pi 3] Running Lights (5 LEDs) is a runnable microcontroller simulation example on SensBench — open the wired circuit, inspect the code, and compile real firmware in your browser, no install needed. Last updated Aug 14, 2026.
FREE SIMULATOR EXAMPLE · INTERMEDIATE
[Pi 3] Running Lights (5 LEDs)
This example sweeps a Knight-Rider light pattern across five LEDs on the Raspberry Pi 3 — GPIO17, 27, 22, 5, 6 — with a Python gpiozero script. Upload it, run it, and the five LEDs chase back and forth in the classic bounce.
| Board | Raspberry Pi 3 Model B (Cortex-A53, QEMU-emulated Linux) |
|---|---|
| Difficulty | intermediate |
| Category | basics |
| Libraries | None — just the Arduino core |
| Runs in | Sensbench browser simulator — free, no account |
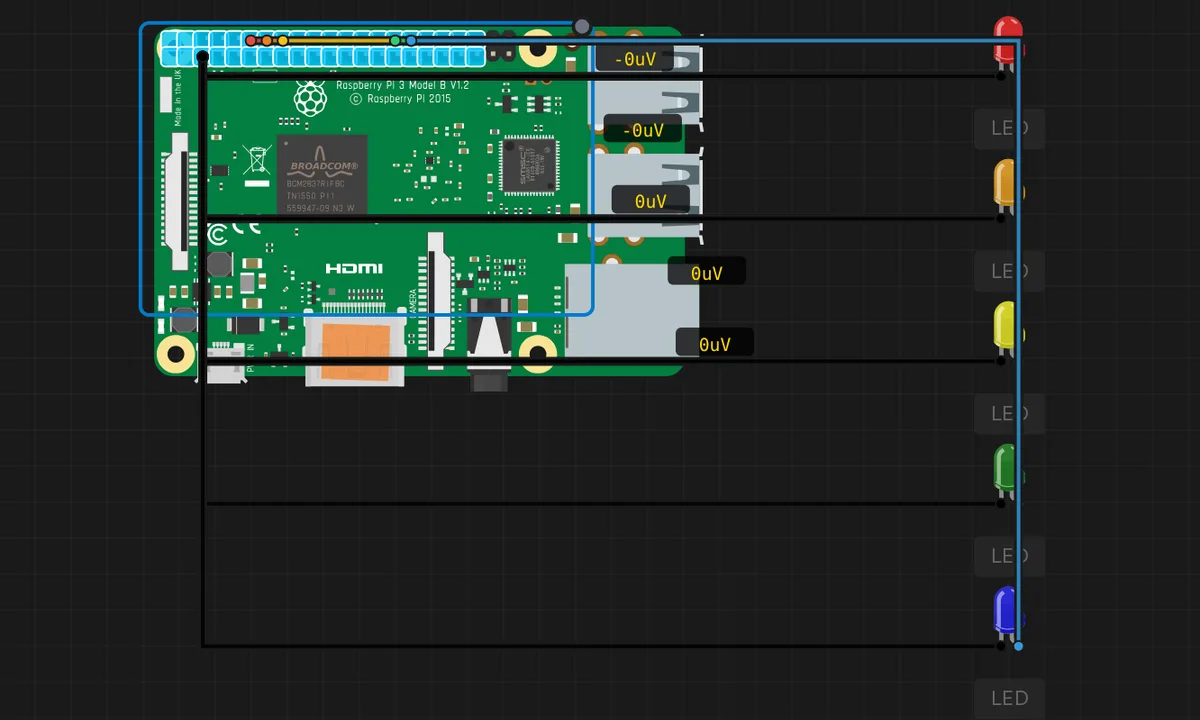
The exact circuit you get when you open this example — already wired, ready to run.
The Python script
#!/usr/bin/env python3
# Raspberry Pi 3 - Knight Rider / running lights across 5 LEDs
from gpiozero import LED
from time import sleep

pins = [17, 27, 22, 5, 6]
leds = [LED(p) for p in pins]
print("Running lights on GPIO", pins, "- Ctrl-C to stop")
try:
    while True:
        for i in range(len(leds)):
            leds[i].on()
            print("LED", pins[i], "ON")
            sleep(0.12)
            leds[i].off()
        for i in range(len(leds) - 2, 0, -1):
            leds[i].on()
            print("LED", pins[i], "ON")
            sleep(0.12)
            leds[i].off()
except KeyboardInterrupt:
    for led in leds:
        led.off()
    print("Stopped")
How it works
The script builds five gpiozero LED objects on GPIO17, 27, 22, 5 and 6 — five consecutive BCM pins. The forward loop lights each LED in turn for 120 ms, then the reverse loop walks back from the second-to-last to the second, skipping the endpoints so the sweep “bounces” cleanly — the classic Knight-Rider pattern.
The 120 ms step is the tempo: each sweep takes about a second, which reads as a smooth chase without looking frantic. The print of each pin number turns the terminal into a log of which LED should be lit, handy for spotting a dead pin on real hardware.
Before you build it for real
Five LEDs means five series resistors on a real bench — the simulator shows none, real silicon needs 220 Ohm per LED. The Pi can source about 16 mA per pin and 50 mA total from the 3.3 V rail, so five LEDs at 10 mA each is 50 mA — right at the edge; budget the currents or the rail sags and the Pi can reboot. And BCM numbering means GPIO5 is physical pin 29, GPIO6 is pin 31 — the pins are not in header order, so double-check each jumper against the pinout diagram before powering up.
Get the parts
Related examples
FAQ
Why is the reverse sweep using range(len(leds)-2, 0, -1)?
The forward pass lights every LED including both ends. The reverse pass starts at the second-to-last LED (len-2) and walks back to index 1, deliberately skipping the endpoints — that produces the classic “bounce” where the light reverses at the edges instead of repeating the end LED. It is a tiny off-by-one that makes the Knight-Rider effect correct.
Why gpiozero's LED objects in a list?
Building [LED(p) for p in pins] creates five independent LED objects in one line. The loop indexes the list with leds[i], so the same code drives any number of LEDs — change the pins list and the pattern scales without touching the logic.